Onboarding Your Clients
At this point of the MSP Onboarding Program, you'll onboard and successfully register three of your clients on Apple Business Register. For Apple to consider you as a public Messaging Service Provider (MSP), one of your chosen client needs to actively use Apple Messages for Business. Ensure that your teams are fully prepared to assist clients in planning their customer experience, completing integrations, and launching Apple Messages for Business.
Configuring Your Production MSP Account
Once Apple verifies and approves your platform integration you can proceed to Business Development. Before you begin, you need to make modifications in your MSP and Apple Messages for Business accounts at Apple Business Register.
In your MSP account, configure a Commercial/Public MSP account with your production URL, and send it for review. Once Apple approves the new configuration, clients registering for Apple Messages for Business can select the name of your Commercial/Public MSP account.
In your Apple Messages for Business accounts, choose an account and change the account type or create a new one using the Commercial/Public type. Follow the instructions for setting up Apple Messages for Business accounts and set it up properly with your assigned client. Normally, an MSP is eligible to have one Commercial/Public Apple Messages for Business account. It should leverage your product name or corporate identity. If you need more accounts, please reach out to the Apple Messages for Business team.
Preparing Your Sales and Customer Success Teams
Resources are available to your sales and customer success teams to educate them on Apple Messages for Business features and best practices. Utilizing this knowledge base will assist your teams on providing your clients with a thorough understanding of Apple Messages for Business for onboarding. Complete the steps below to prepare your teams for onboarding your clients.
- Sign up your sales and customer success teams for Apple Messages for Business online training.
- Once your team members have completed this training, schedule a Q&A conference with the Apple Messages for Business team to follow up on any questions or concerns.
- Create three internal email aliases, such as amb-execs, amb-sales, and amb-tech@<yourdomain.com>. This enables the Apple Messages for Business team to quickly reach the right people in your organization.
- Your MSP, under certain conditions, is eligible to have one branded commercial DEMO account, for your sales team to use during their sales pitch. This demo should demonstrate all Apple Messages for Business features, and use, for example, a QR code as an entry point. If you want more information about the demo account, please reach out to the Apple Messages for Business team.
Onboarding Your First Client
Client onboarding is essential to your success as an MSP. The first clients that you onboard for Apple Messages for Business can set the stage for promoting your MSP to other clients. You may have clients in mind that you wish to promote as showcases once they are live on Apple Messages for Business. The clients that you select should possess the qualities of a successful client outlined below.
Select three of your clients that want to use Apple Messages for Business, and communicate these with your Apple Messages for Business representatives. Have them sign up in Apple Business Register. Once they've created their Apple Messages for Business account, they can link it to your MSP account.
End-to-End Process
Apple recommends that you review the Onboarding Overview, which details the end-to-end launch process, and provide this document directly to your clients.
Qualities of a Successful Client in Apple Messages for Business
You can determine how ready your clients are in going live by asking them the following questions in the listed categories:
Digital maturity. Is the client excited about adopting new technologies to change how they interact with their customers. Senior executive support for messaging. Is there higher internal support for adding and developing Apple Messages for Business as a channel than beyond the Customer Care team? Setting performance goals expectations. Has the client defined their goals for digital engagement and have they defined how Apple Messages for Business fits into these goals? What does the client expect to accomplish by enabling Apple Messages for Business?
Analyze Channel Business Goals and Identify Use Cases
Engage with your regional Apple Messages for Business representative early in the design process. They can provide implementation suggestions that can help meet client goals. Apple recommends using the Apple Messages for Business Readiness Review to quickly assess the goals that are most important for the client.
You can begin by determining the top contact drivers in both digital and voice channels. Identifying low-value drivers that result in high cost-to-resolve for the client, can be places to explore for adding interactive content or self-serve use cases.
Make sure that you’re able to provide the client with clear expectations on performance metrics collection in the channel based on their primary goals. Additionally, put in place a regular review plan to go over the goals they identified after launch.
Designing a Conversation Flow
Guide the client to follow the conversational design guidelines when interacting with customers on Apple Messages for Business. You can find general guidance in Design and Implement Your User Experience.
Below are tips to ensure a quality user experience:
Provide an automated greeting to the customer upon their first message. For experiences that don’t include automation on the front-end and are agent only, provide an automated response for off-hours. This sets the customer’s expectation on when to receive a response from the client.
Provide automated triage. Use list pickers and quick replies instead of textual menus to provide an easier navigation experience for the customer.
Focus on tap, not type, interactions. Encouraging tap versus type interactions allows customers to easily navigate through needs resolution while going about their day. Use Interactive Features, like QuickType prompts, and format questions in a way that allows the customer to easily send responses.
Focus on users in context. Present information that is helpful to the customer in their current context. Don’t ask for identifying information unless it’s required to resolve the customer’s need. Utilize interactive content to provide assistance that reaches across iOS.
Interactive Content
Working with your clients and following the Human Interface Guidelines, you can create user-focused features
to integrate interactive content. The following features enhance the user experience:
Quick Replies. Provide a simple way for the user to make an inline choice with a single tap during an ongoing conversation. You can have between two and five customizable choices, and the user can select only a single item. To learn more about list pickers, see REST-API - Quick Reply Message.
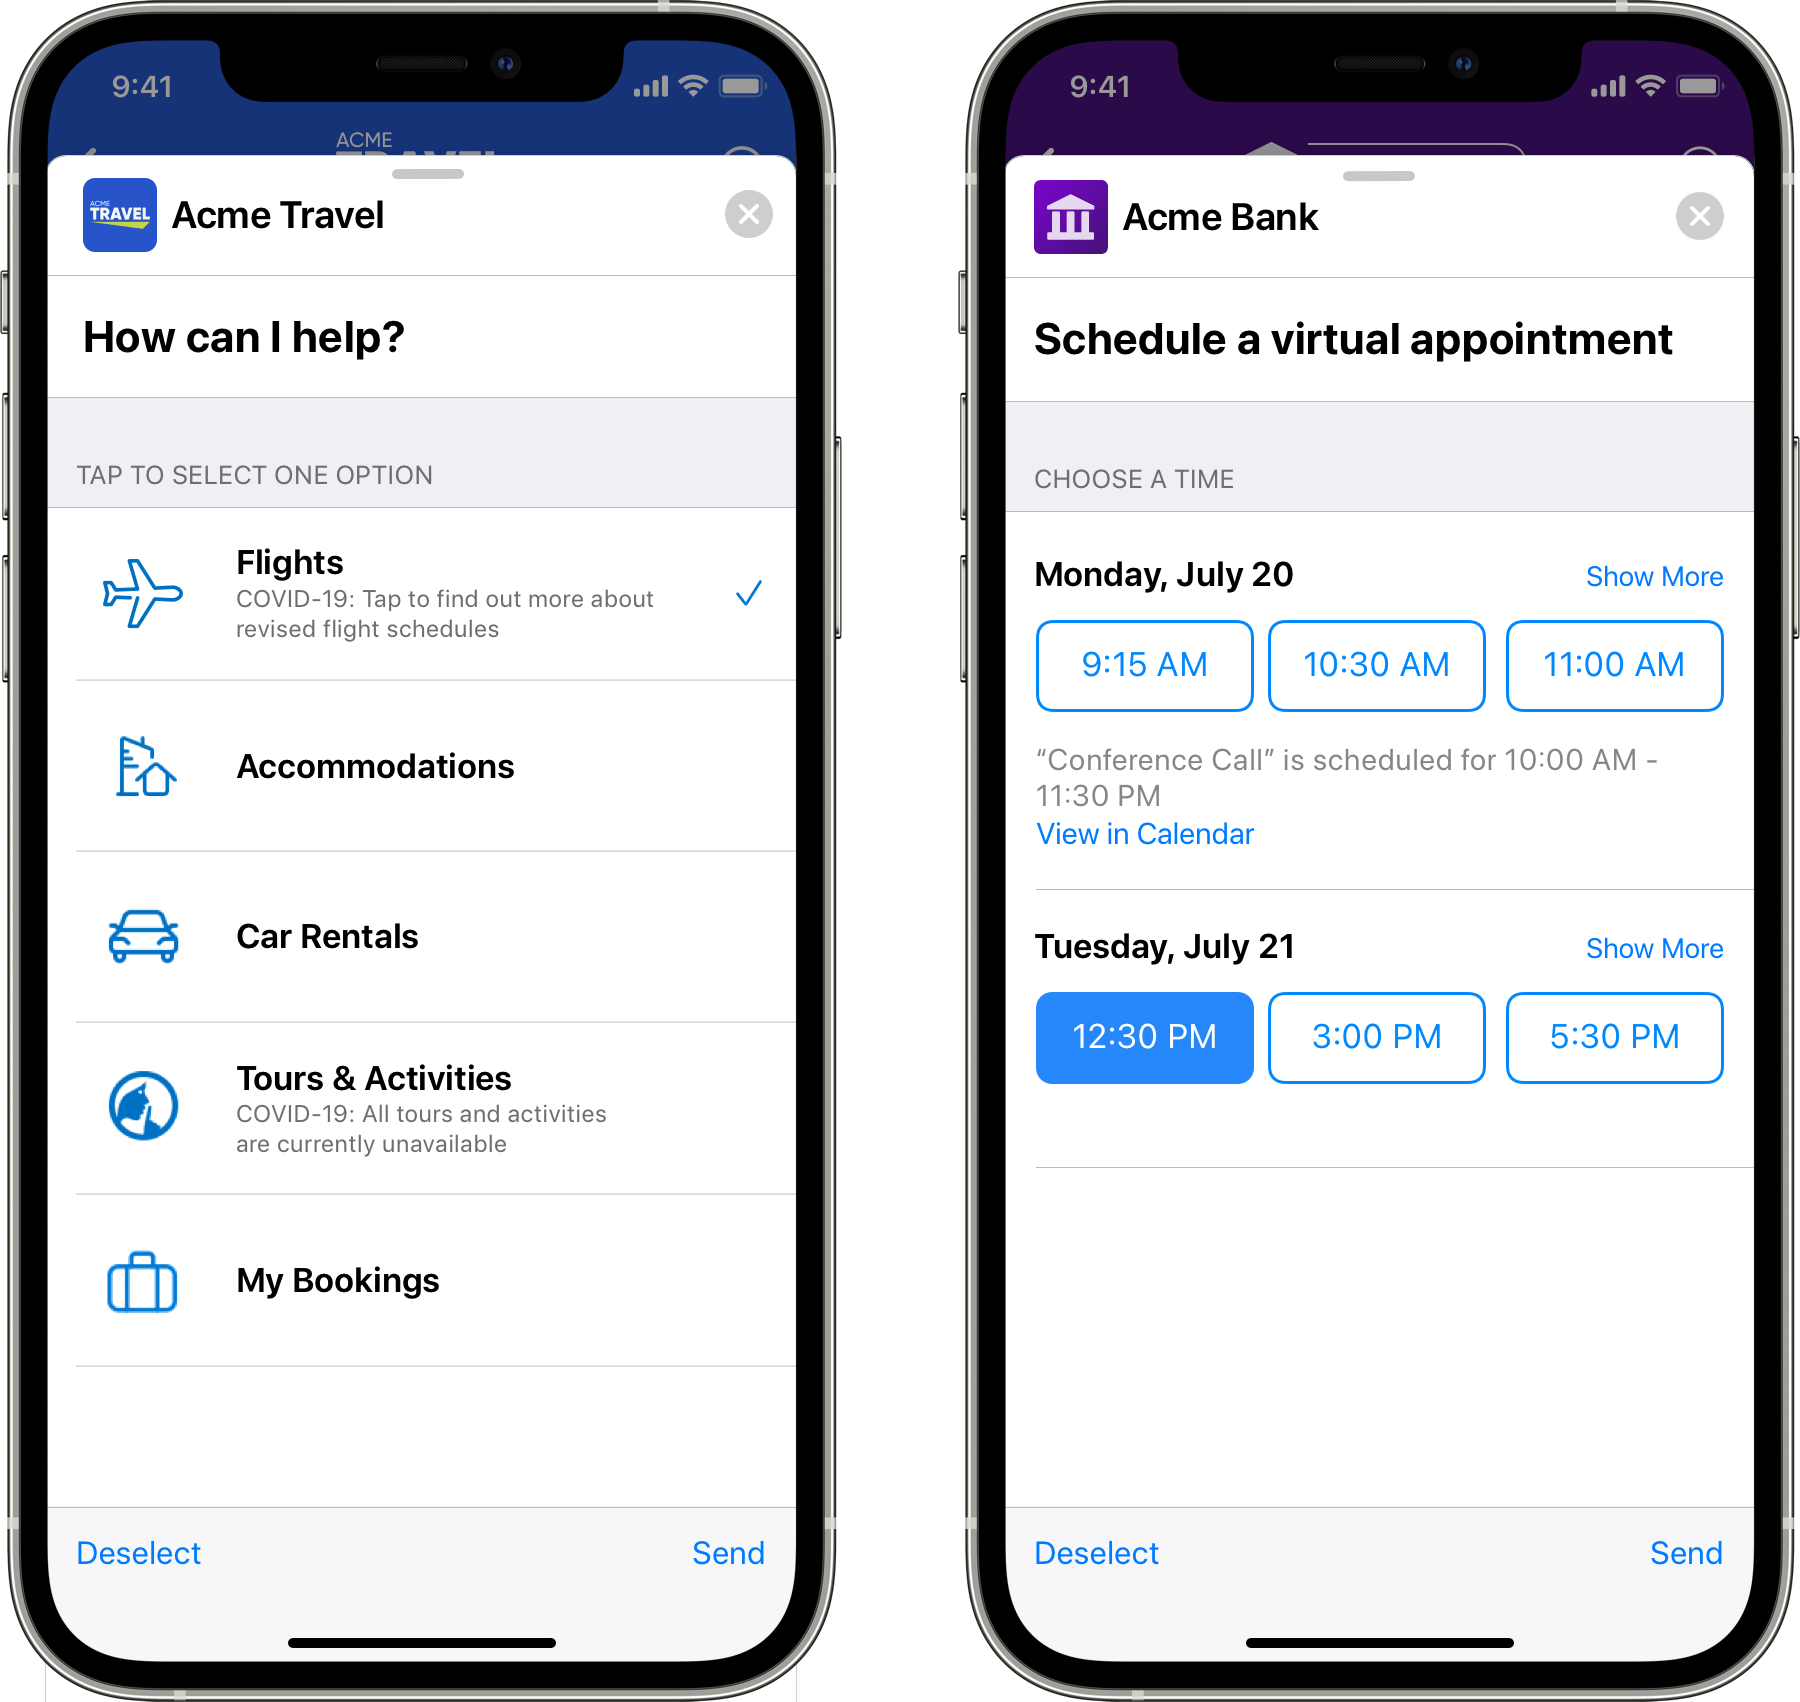
List picker. Triage a user's intent (image below, list picker on the left) by guiding the user through automated self-serve flows and product selection. For more information, see REST API - List Picker Message.
Time picker. Schedule appointments, select dates for reservations, or coordinate in-store pickup using a time picker (image below, time picker on the right). Selected times are added directly to the Calendar app by the user. You can integrate the time picker with a scheduling system managed by the client. For more information, see REST API - Time Picker Message.
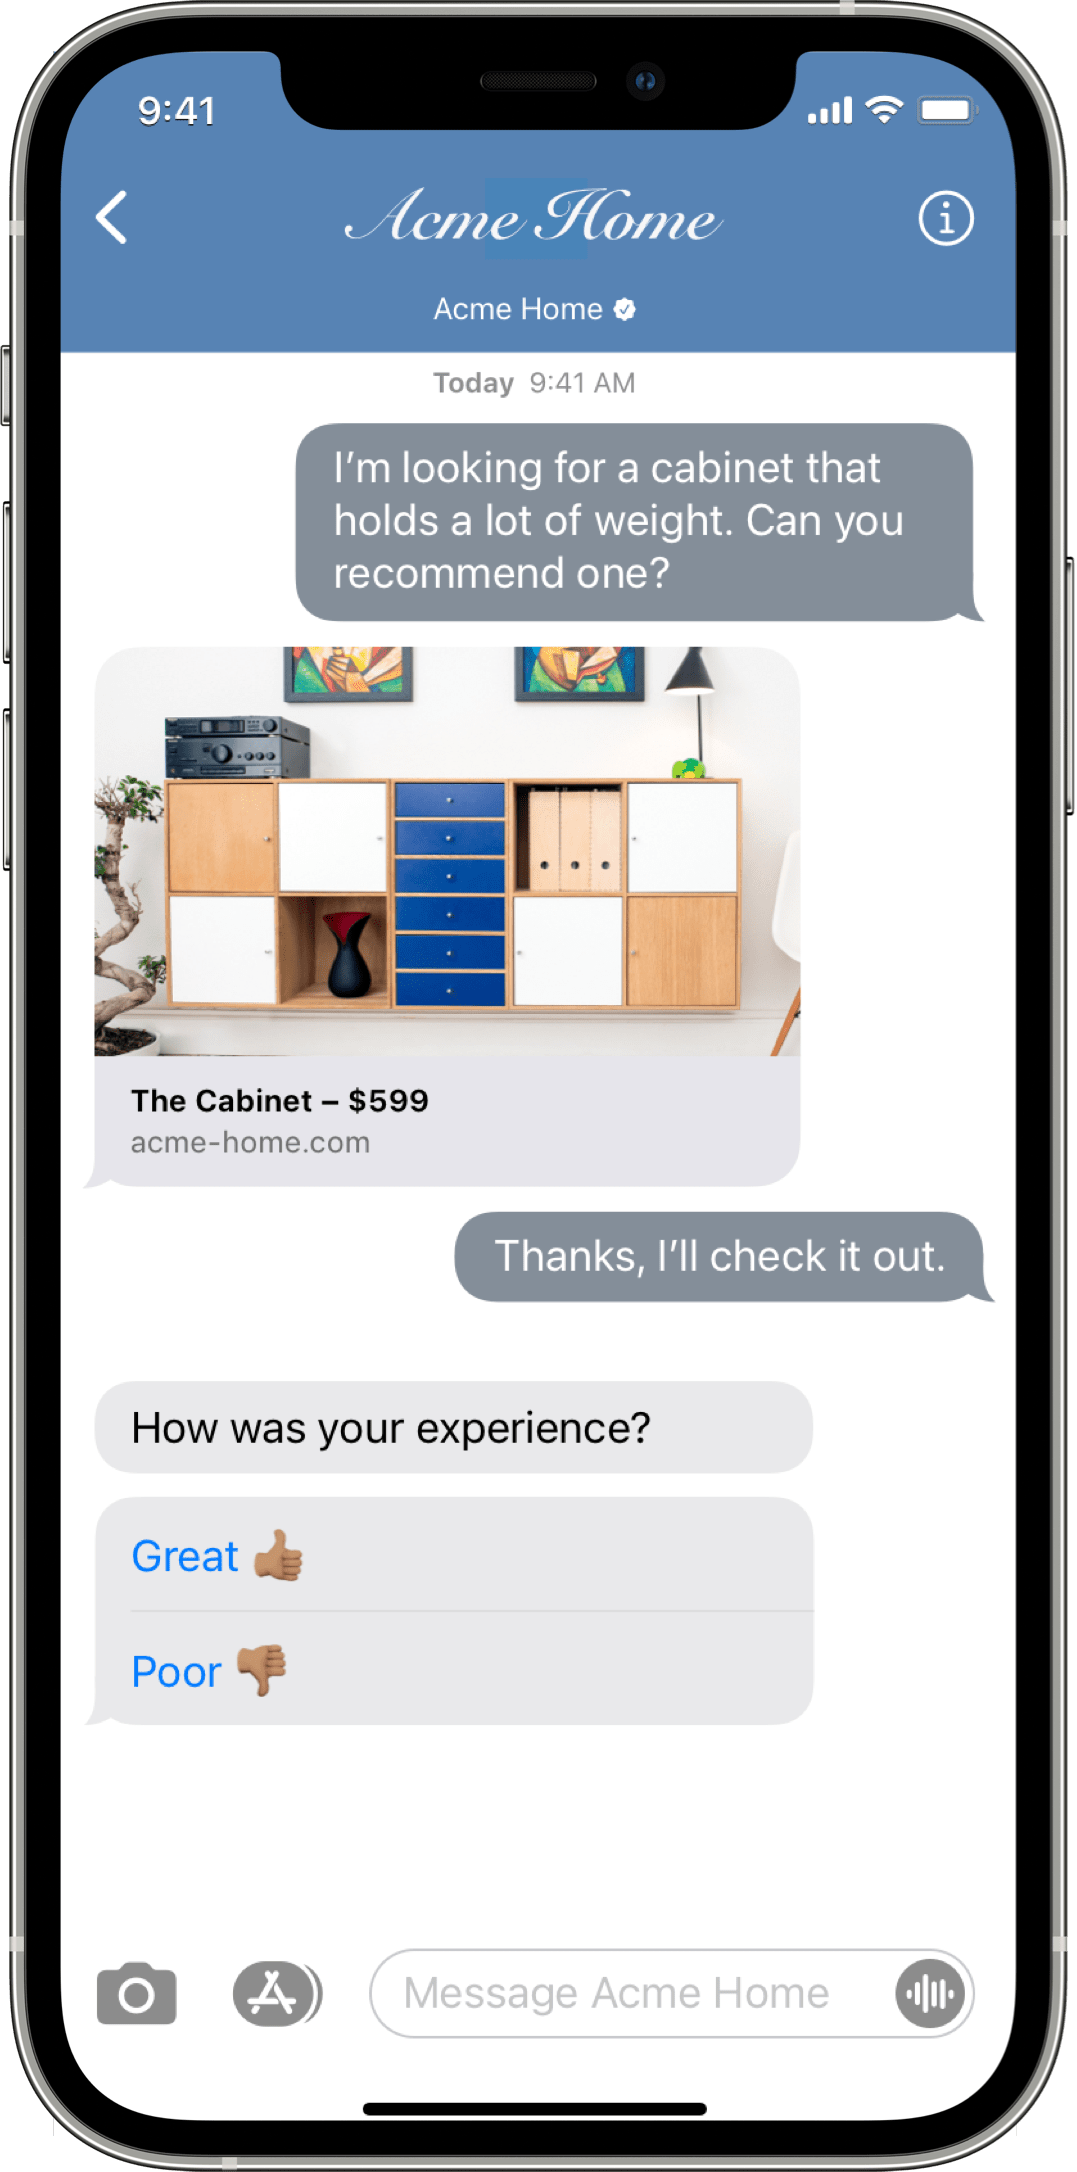
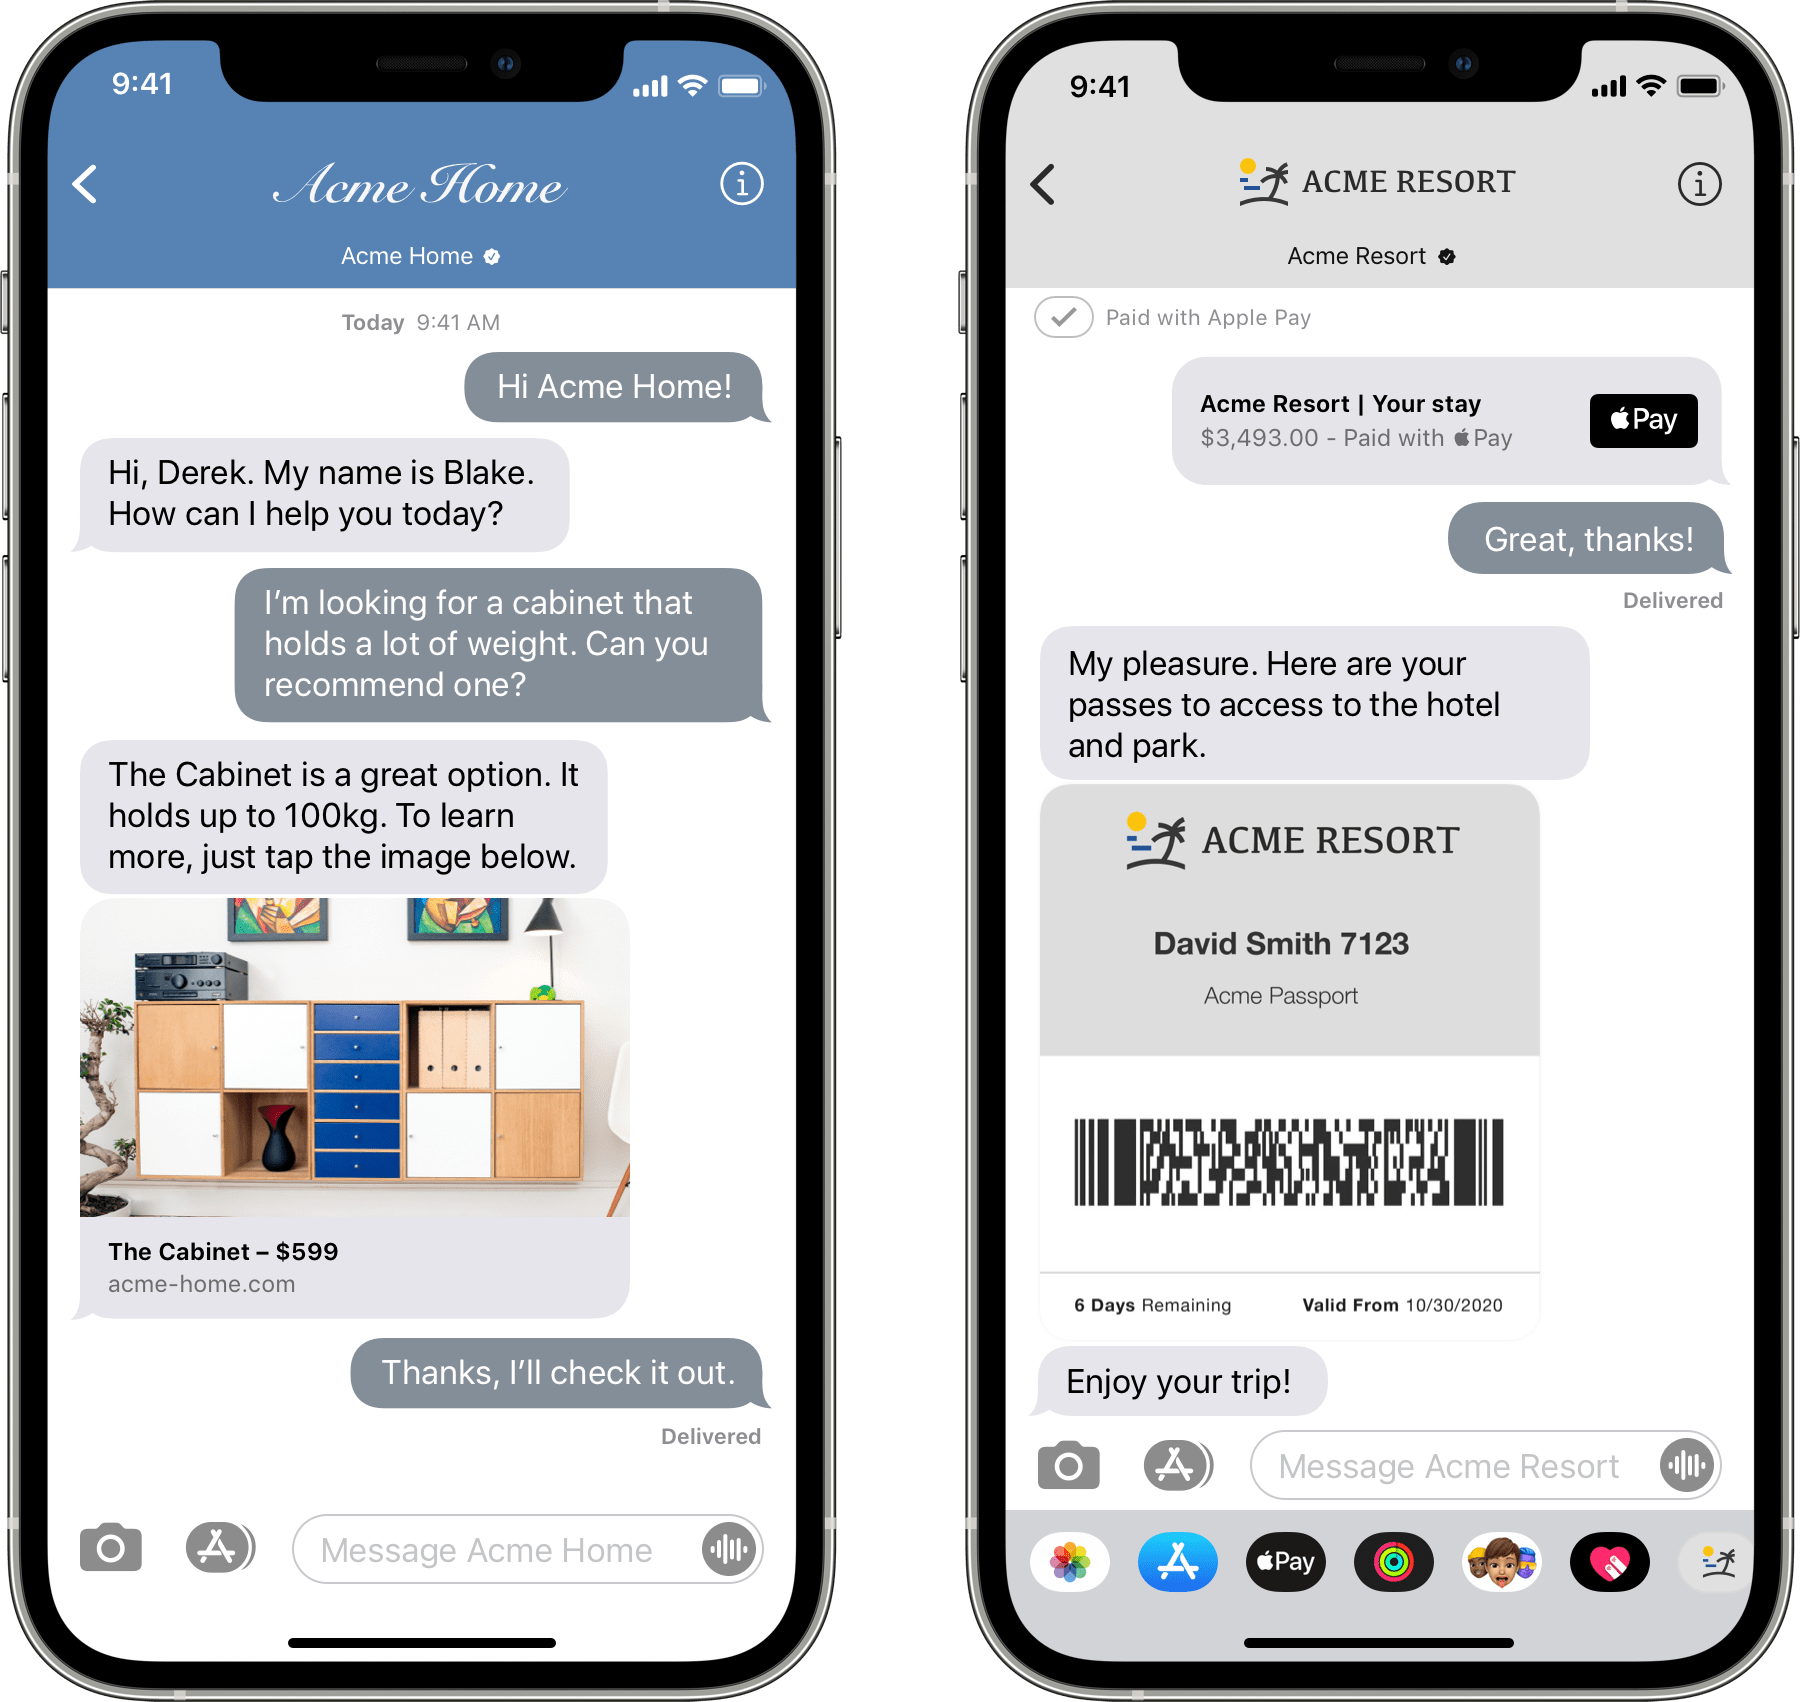
Rich links. Allow a customer to preview a product by sending rich links (image below, rich links on the left) with product image previews. Video previews can also be added to rich links for a more immersive experience. Rich links provide customers the reassurance that the website being directed to, is secure and owned by the client. For more information, see REST API - Rich Link.
Wallet Cards. Provides customers with instant access to tickets, membership cards, or reservation
confirmations that they can easily save in their Apple Wallet (image below, Wallet cards on the right). To send Wallet Cards in
Apple Messages for Business, send them as an attachment.
For guidance on creating Wallet Cards, see Developer Documentation.
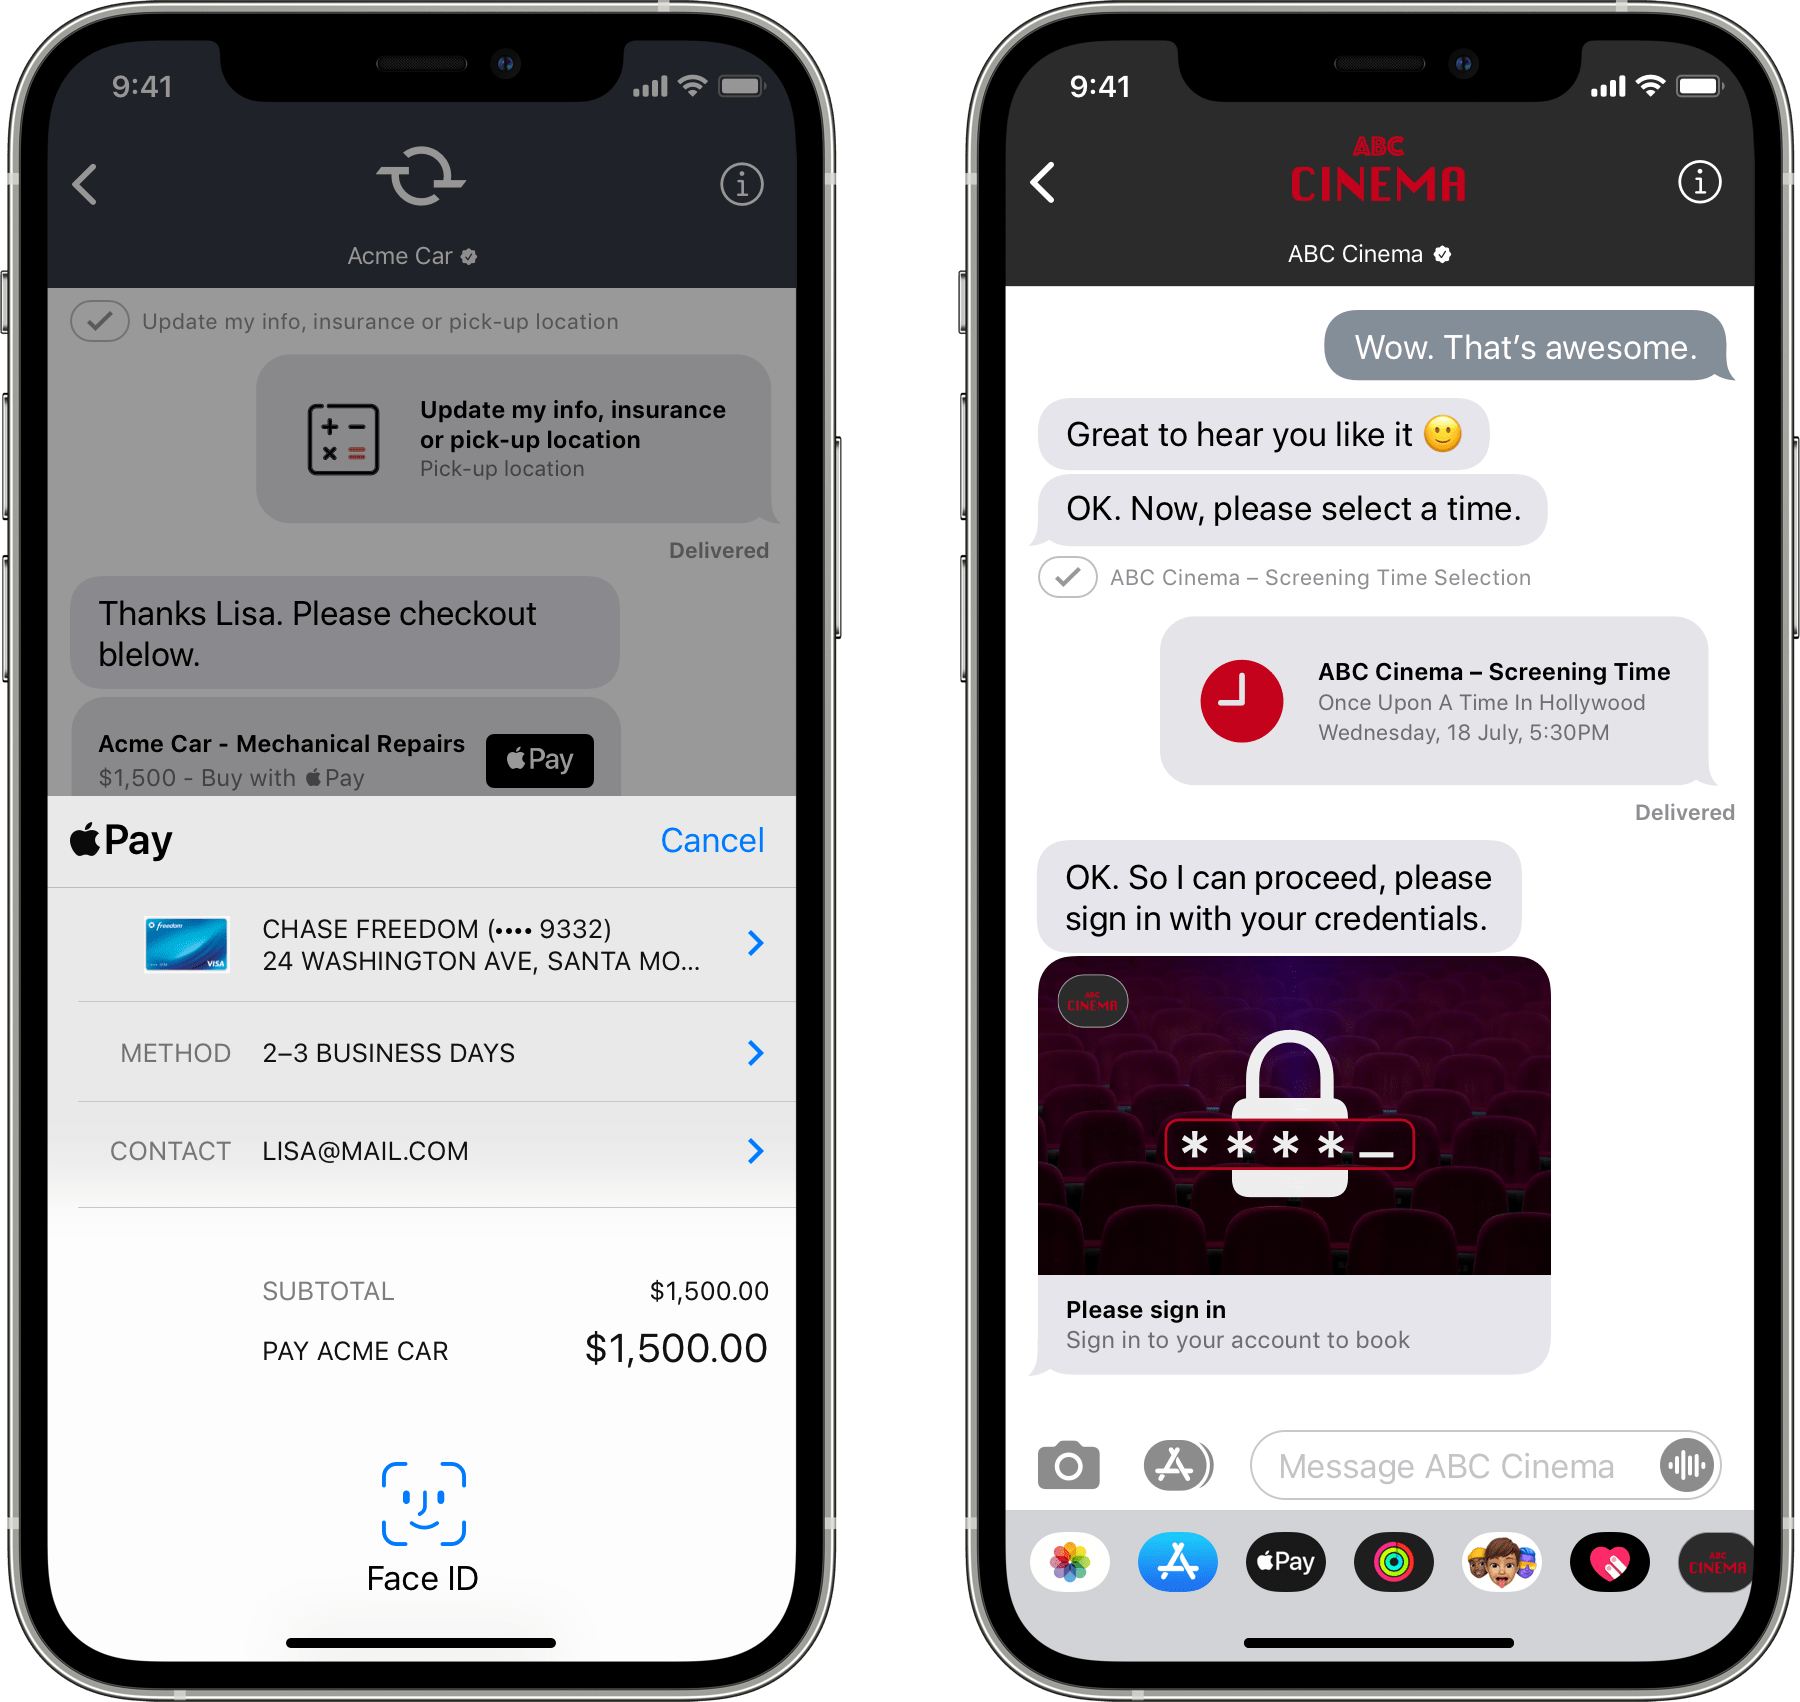
Apple Pay. Grow the channel as a sales or e-commerce platform by sending Apple Pay requests (image below, Apple Pay on the left) over Apple Messages for Business. Allow users to complete purchases or bill payments with the ease of Apple Pay. View Apple Pay in Apple Messages for Business for guidance on how to set this up with your clients.
Authentication. Allow customers to authenticate (image below, authentication on the right) in Apple Messages for Business using OAuth2. Provide personalized care without leaving PII in the agent transcript, providing support for authenticated use cases. For guidance, see Authentication.
iMesssage apps. Support additional or more complex functionality through the use of iMessage apps (image below). This is a great way to provide in-app utility, without ever leaving Messages. Clients who already have iOS apps created can reuse investments made in their app by recycling code into the iMessage app. Coordination may be needed with the client’s app development team. The resources below can be shared for more information:
- Developer Guidance on iMessage apps
- Design Guidelines for iMessage apps
- Sending iMessage apps over Apple Messages for Business
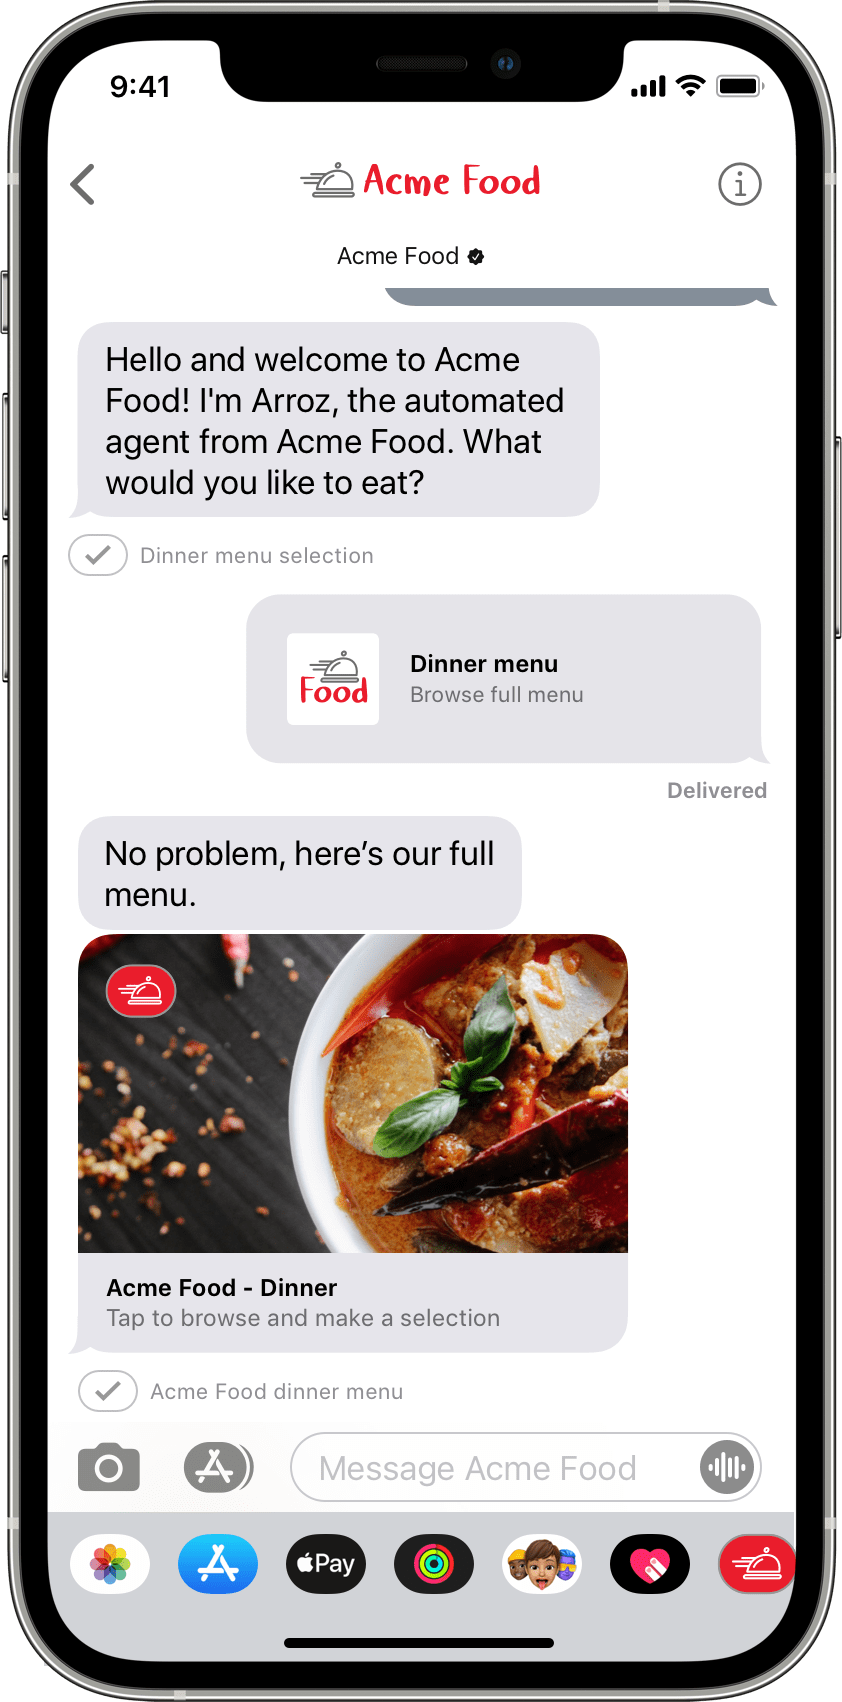
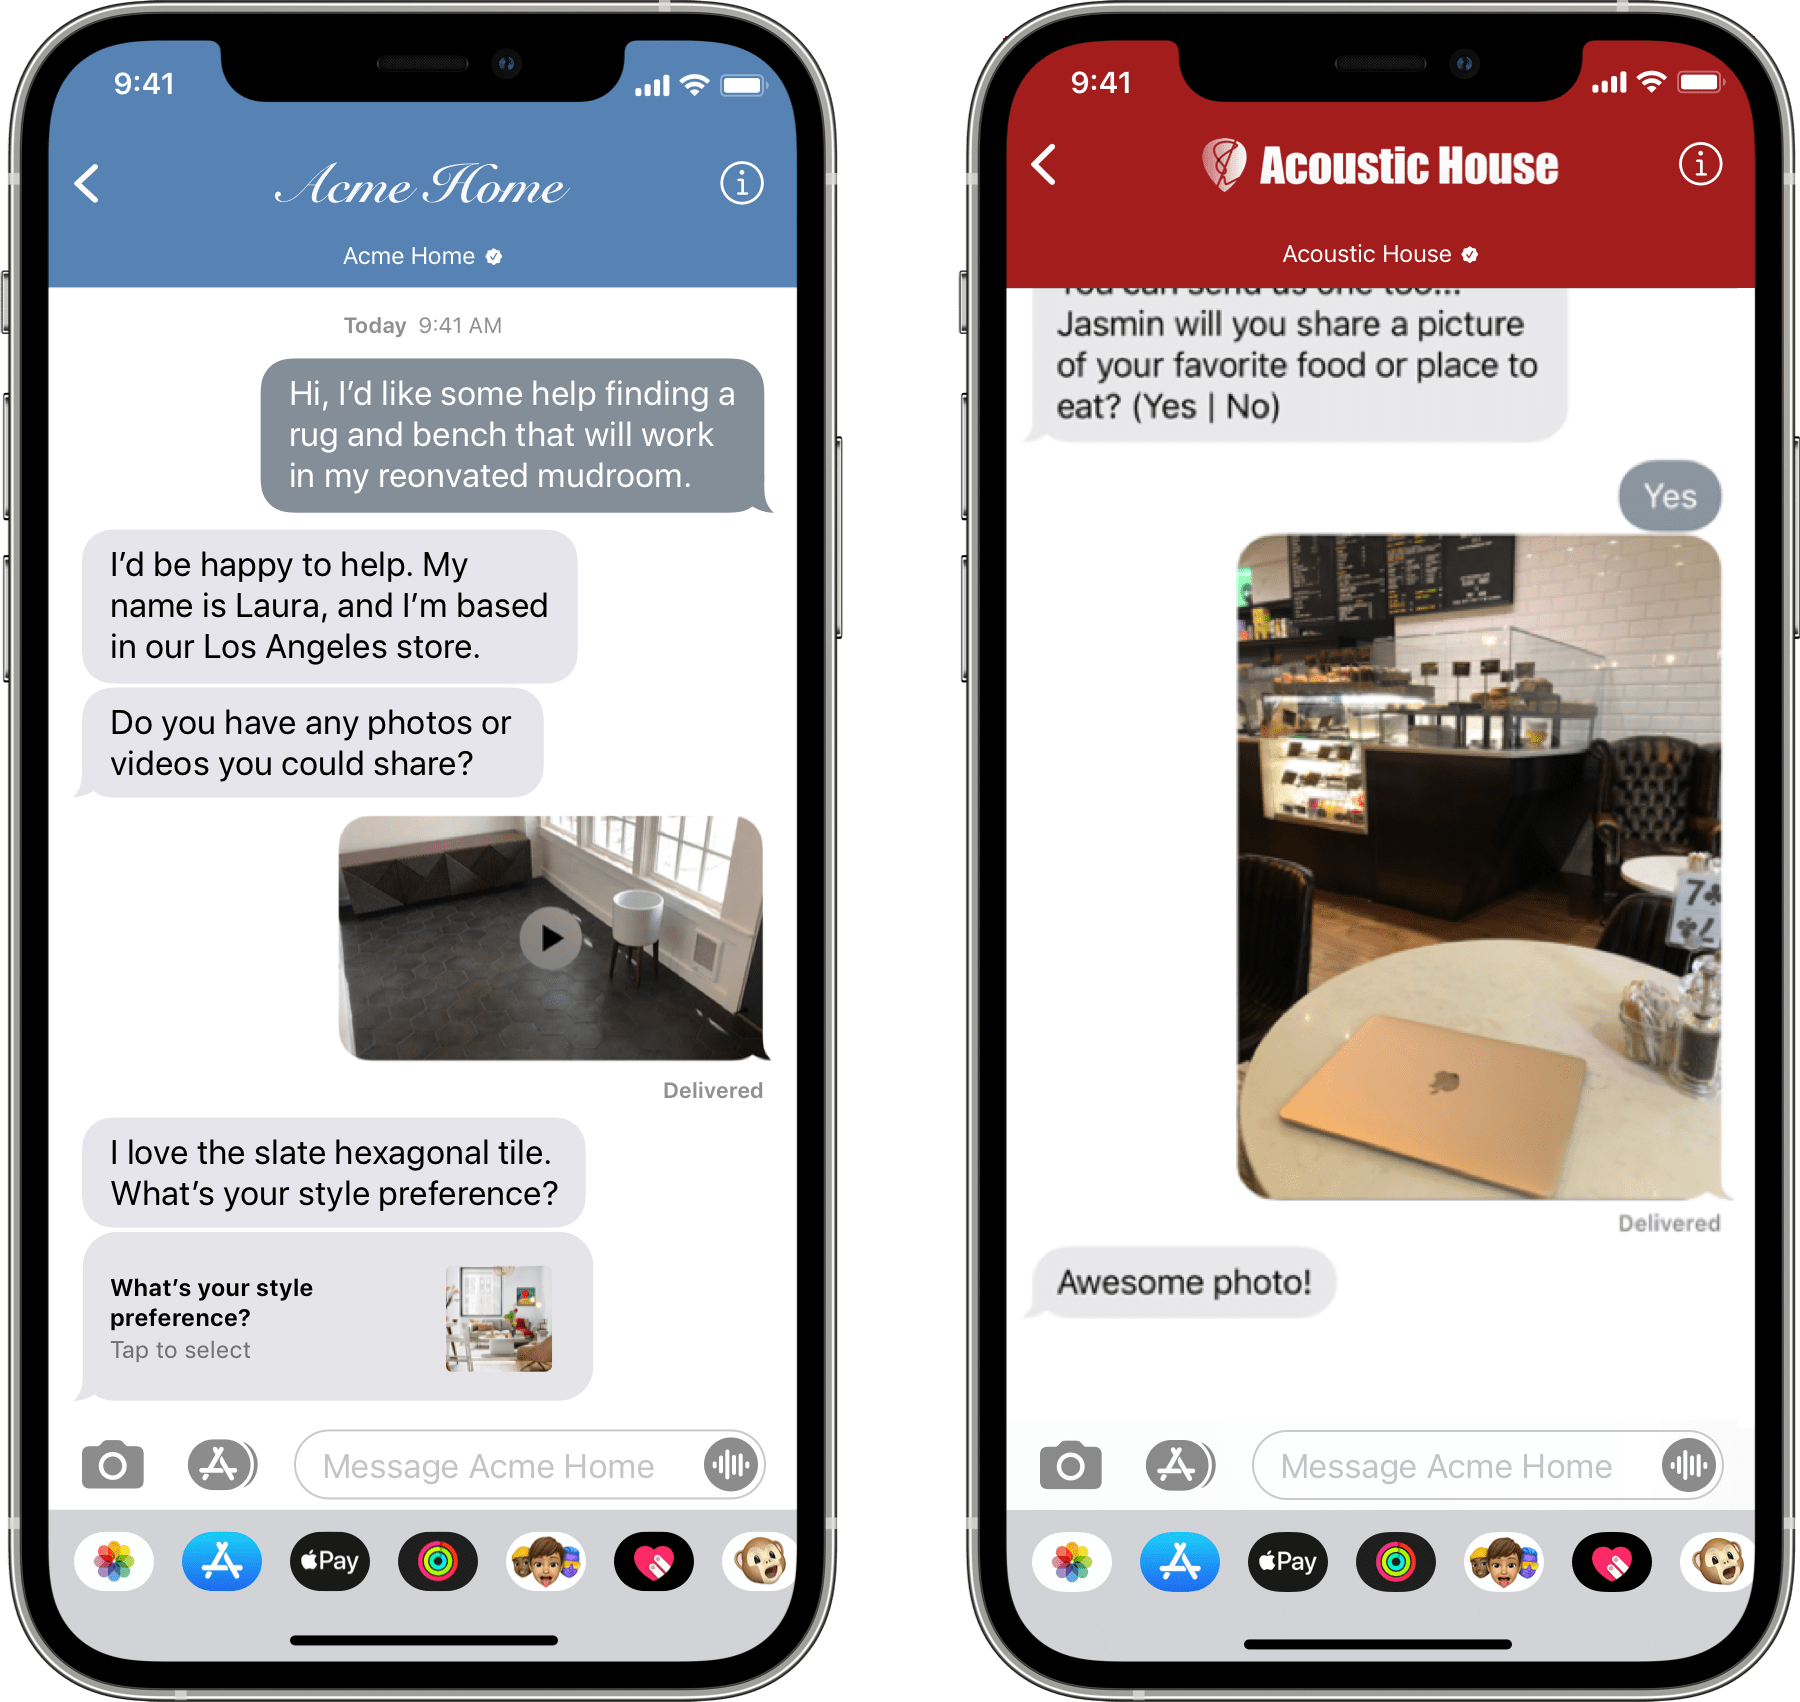
Image sharing. Photos can be sent (image below, image sharing on the left) by or to users, allowing for easier resolution. Images can be sent by agents or automated assistants to display products, share image resources already utilized on the website, or just for fun! Allow users to send images to provide proof of purchase, damage, or just to share their favorite products.
Video sharing. Sharing videos with users (image below, video sharing on the right) can create a more immersive and direct way of providing product or service descriptions and instructions for troubleshooting. Allow users to send a video for proof of incident or to share how happy they are with a product.
To send images and videos over Apple Messages for Business, see Sending Messages with Attachments.
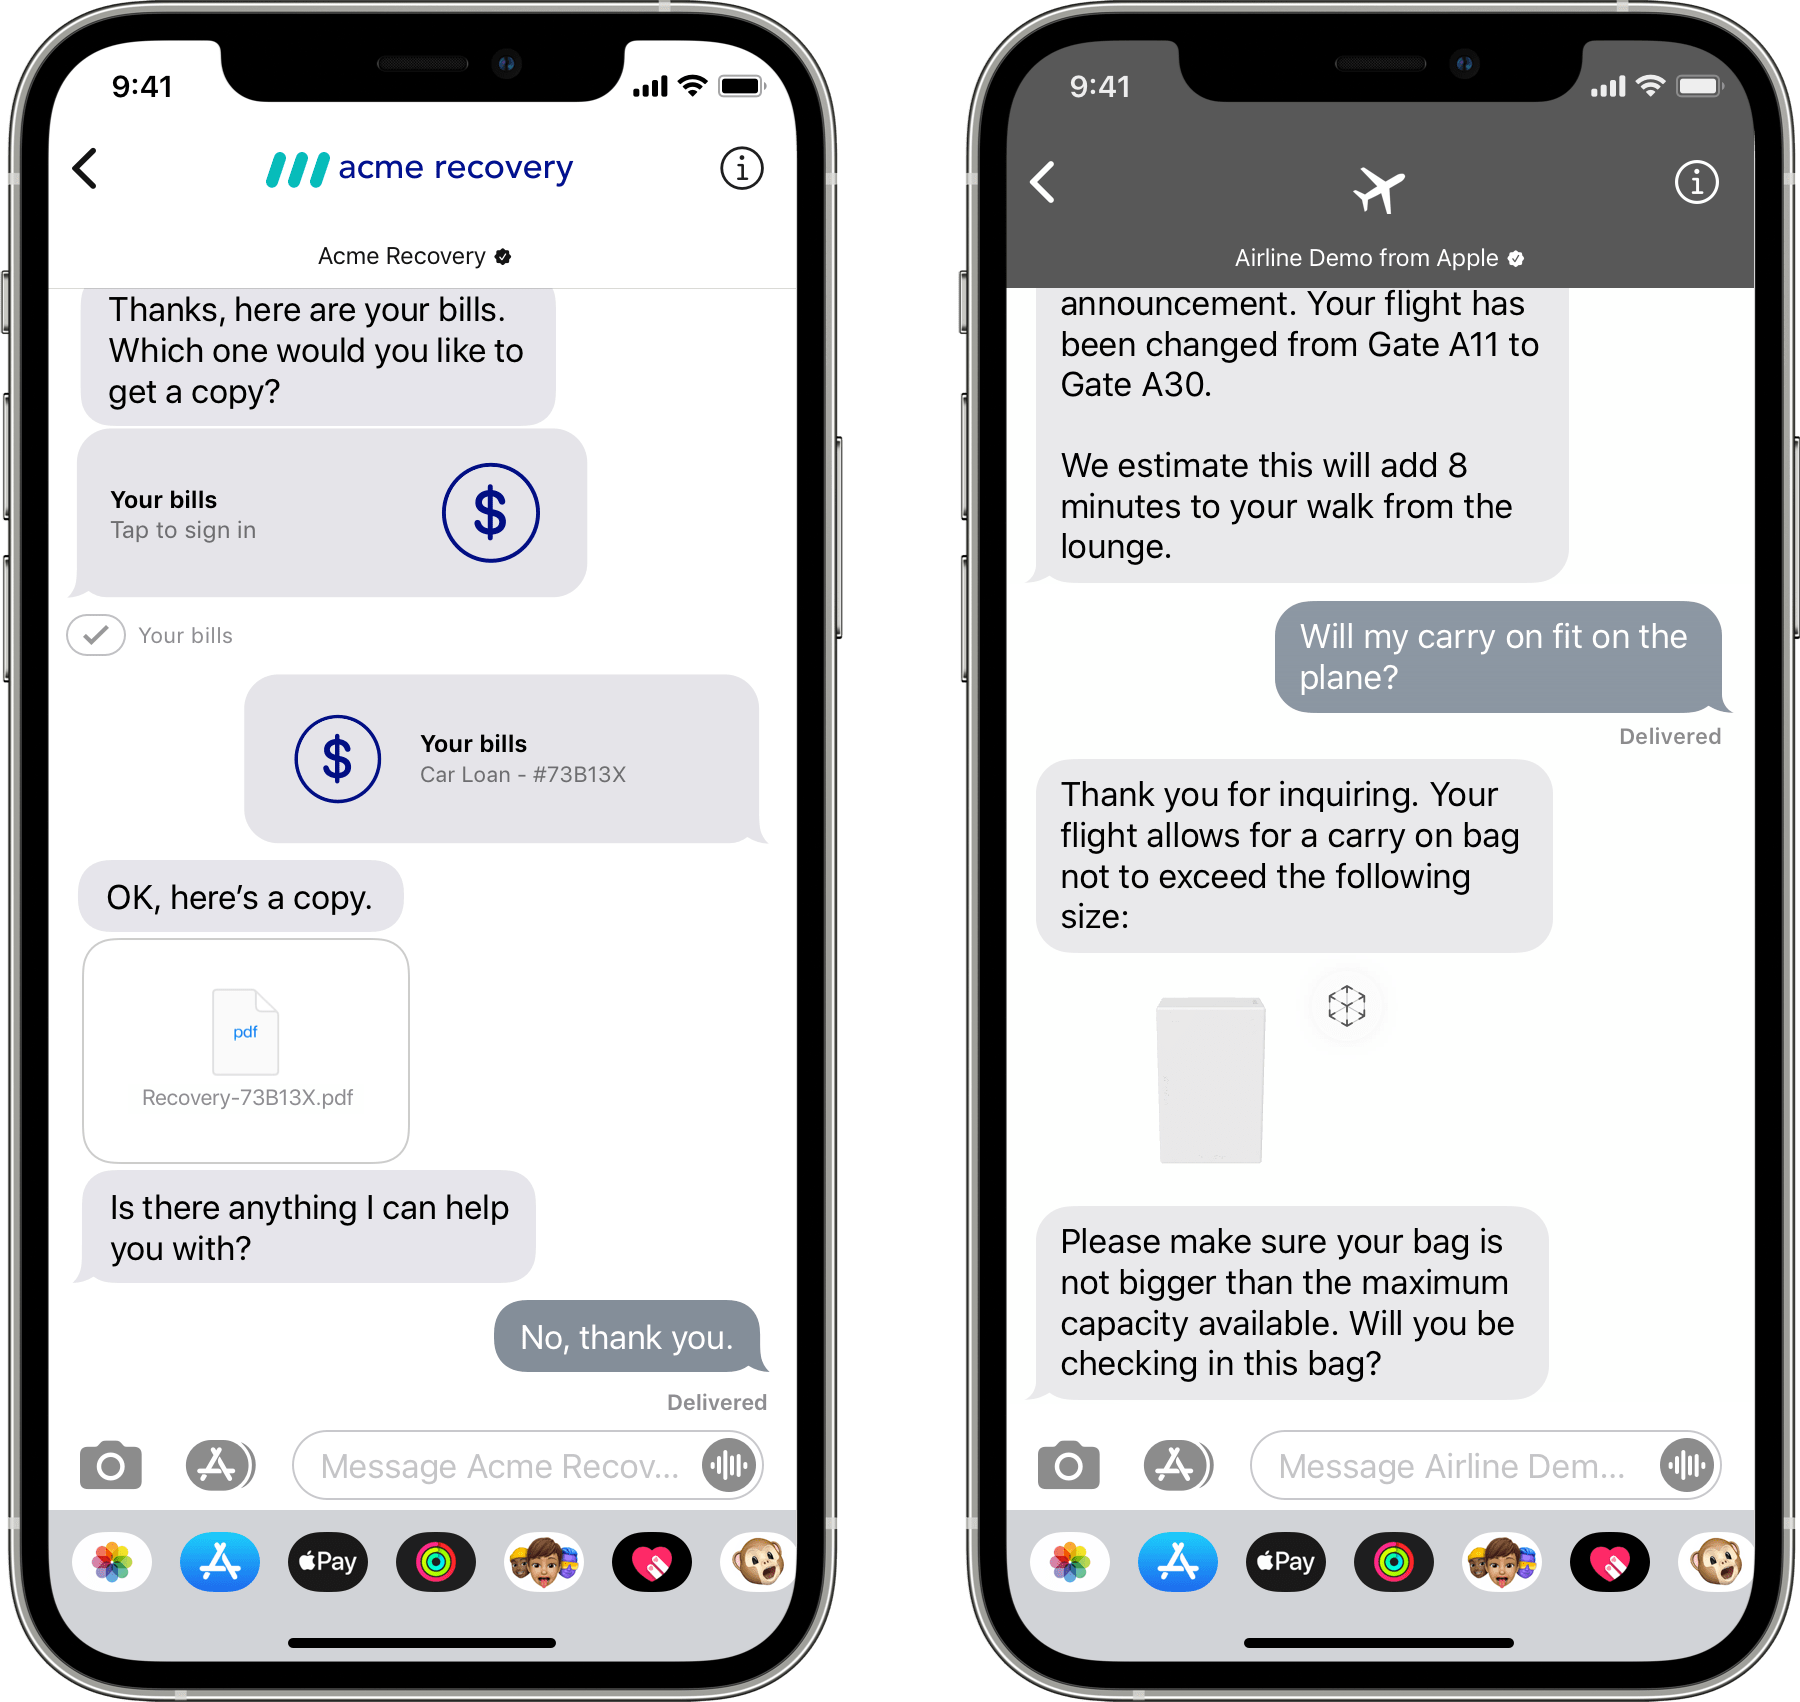
Document attachments. Send documents (image below, document attachment on the left) in the form of PDFs to provide billing statements or other forms that a user can store for safe keeping. Send PDFs as fillable forms so that users can complete a document, sign it electronically, and send it back to the agent for processing.
Augmented reality. Give users a real world view of a product by sending over 3D images with Augmented Reality (AR) Quicklook (image below, AR on the right). Users can view virtual and real content, side by side, for size comparison or product fit. For information about AR Quicklook, see Previewing a Model with AR Quick Look.
To send PDF and USDZ files over Apple Messages for Business, see Sending Messages with Attachments.
Some interactive content is available for specific version of macOS and iOS/iPad OS. Review the table below to adjust the user experience and leverage the capability-list HTTP header. For more information, see HTTP Headers.
| Required macOS version | Required iOS/iPadOS version | |
|---|---|---|
| List Picker / Time Picker | N/A | iOS / iPadOS 11.3 and later |
| Quick Reply | macOS 12 | iOS / iPadOS 15.1 and later |
| Rich Links | macOS 10.13.4 and later | iOS / iPadOS 11.3 and later |
| Attachments (Wallet pass/USDZ/...) | macOS 10.13.4 and later | iOS / iPadOS 11.3 and later |
| Apple Pay | macOS 10.13.4 and later | iOS / iPadOS 11.3 and later |
| Authentication | macOS 10.14 and later | iOS / iPadOS 12 |
| iMessage app | N/A | iOS / iPadOS 11.3 and later |
| Form | N/A | iOS / iPadOS 11.3 and later |
Complete Integrations
Before proceeding to the next stage, make sure to complete all necessary integrations to secure a smooth path to launch.
- Make sure that Rich Links function correctly with all possible links provided by clients to support their use cases.
- Make sure that list pickers are functional to support automated triage.
- Verify that Apple Pay is functional to support digital sales.
- Make sure your authorization functions appropriately.
- Verify that all interactive features are integrated with the client’s CRM or OMS.